Tana
Using Tana's Supertags with Search
Learn how to use Tana's supertags with live searches and create amazing workflows.

In this lesson of Tana Fundamentals, we're going beyond the basics of supertags and search and bring everything we've learned so far together into a full workflow for reading and taking notes on books.
Building a Reading Dashboard in Tana
So far we've developed our reading workflow rather ad-hoc and didn't emphasize much where in our workspace it lived. Let's change that and make it a prominent citizen of our left sidebar.
We'll go to the root node of our workspace by clicking on our name at the very top of the sidebar and add a new node called "Reading Dashboard" to it. I like adding emoji as a way to have some visual orientation, so mine is actually "📚 Reading Dashboard".
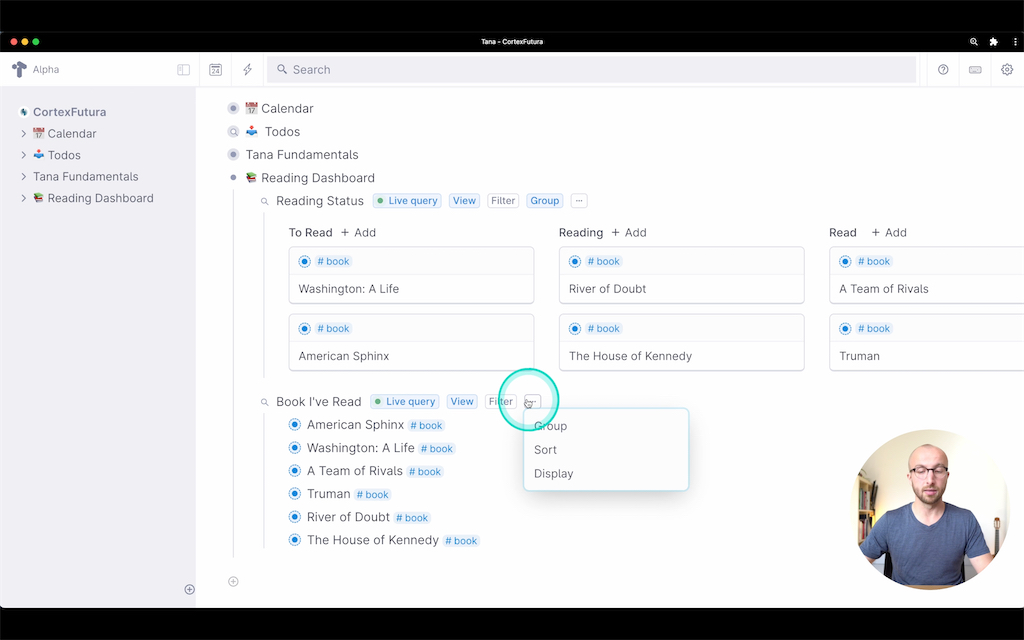
Indented under that node we'll add two live searches: one for our reading progress and one for all the books we've already read.
Reading Progress
First, we want a simple search for all nodes tagged as books, shown as cards, grouped by their "Status" column. This gives us a nice Kanban board where we can drag books from one column to the next, as we start and finish reading them.
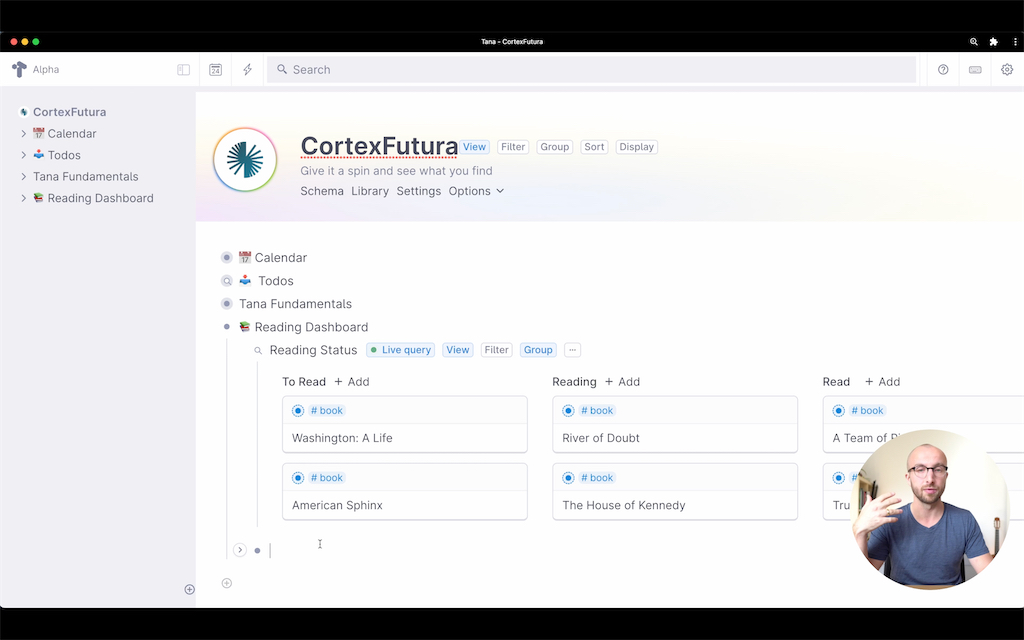
To make this happen, you recall from previous lessons that we hit Cmd/Ctrl+k, type "Find nodes with tag #book as cards" (do use the auto-complete!) and confirm with Enter.
Then we click the "..." button, select "Group by Status" and tada – we're done.
Books Read
To get only the books we've already finished reading, we'll need to dig a bit deeper into how live searches work.
But first, let's create a similar search as before, but choosing "Table" as the View instead of "Cards": hit Cmd/Ctrl+k, type "Find nodes with tag #book as table" and confirm with Enter.
Then, click on the button next to the node title that says "Live Search". This will expand a panel where you can modify and narrow down your search.
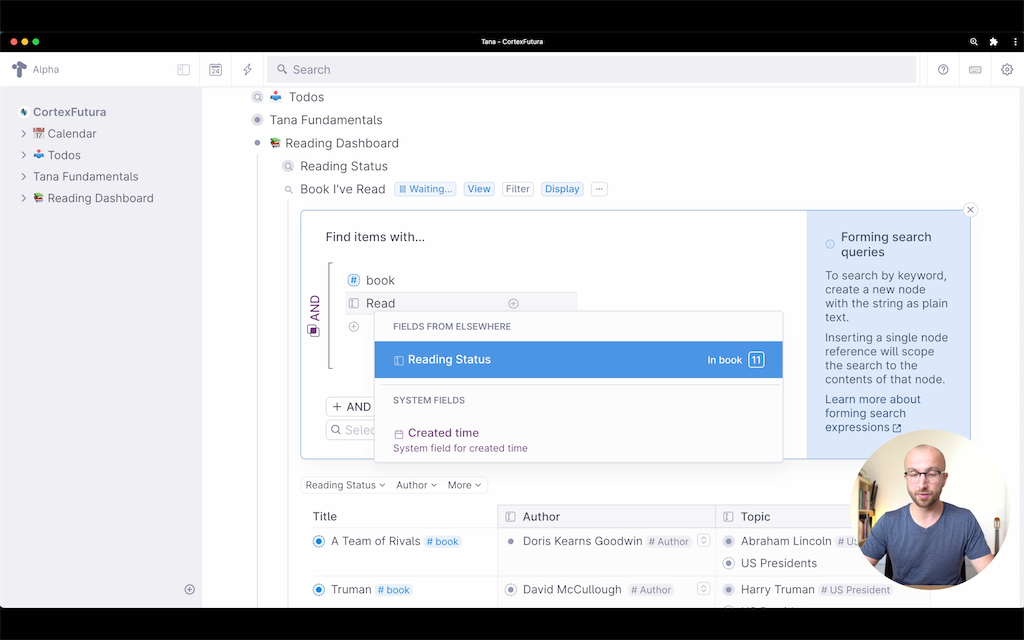
As you can see, the search panel currently contains a reference to the #book tag. To narrow it down to show only books you've read, you can do the following: below the reference to #book, add a field by typing ">". This will give you a search field where you can search for the right field name – "Status" in our case. After confirming this by typing "Enter", you get a dropdown menu for the field value and can select "Read" as the value to search for.
If you click the green "Done" button on the lower right, this will save the search and permanently only show books you have marked as "Read".
You can even use search operators like AND, OR, and NOT in your searches. To search for books that you're currently reading OR have already read, you do the following:
Under the reference to #book, delete the "Status" field and click the "OR" button at the bottom left. This will add a new section to the query – in this section, add the field "Status" twice, and select "Reading" and "Read" as statuses respectively. This should look like the below, and will return all nodes tagged as #book you're currently reading or have marked as "read":

This sort of nesting goes arbitrarily deep, and you have many more options to narrow down the list of results. More on that in a minute.
Tabbed View for Dashboards in Tana
Before we dive deeper into the ways to search, a quick intermission to style our reading dashboard.
Right now, both searches are shown as a list, which isn't optimal. Instead, we can turn them into tabs with two easy steps.
First, go up to the gear icon in the upper right of Tana's interface, select "Tana Labs" and click on "tabsView". This will add tabs as an additional view option.
Then right-click the node icon of your "Reading Dashboard" node and select "Show View Options" and then select "Tabs" as the view.
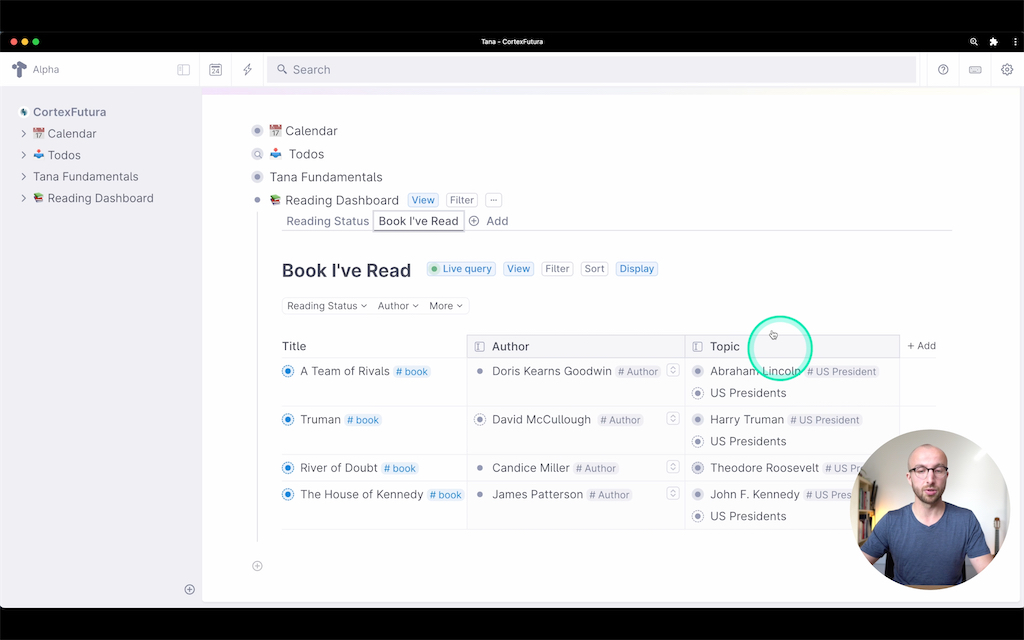
This will turn all child-nodes of "Reading Dashboard" into their own tabs and create a very nice dashboard for us.
Advanced Live Search
To show you a bit more what you can do with live searches, let's return to our search for #US Presidents. Imagine we want to find only those in our workspace that assumed office after the end of the American Civil War.
To do this we first search for #US Presidents and open the search panel by clicking the "Live Search" button. Under the reference for #US President we then add a reference to the @GT (greater than), to which we add a reference for the "Assumed Office" field with the date value of XYZ date, the end of the American Civil War.
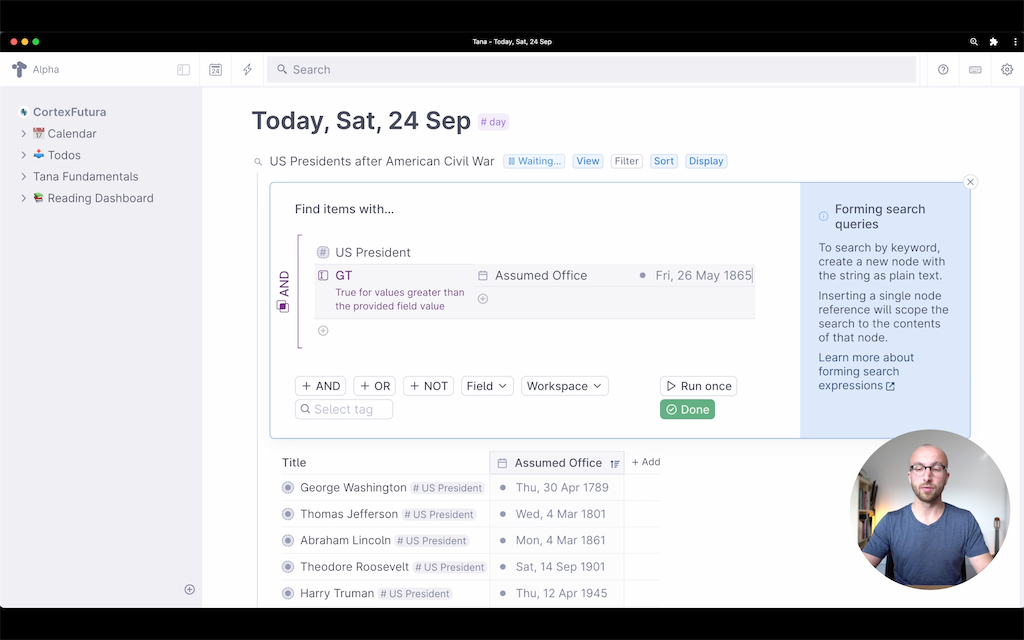
You can, of course, also search across multiple fields: if you have a field recording the president's party, you could search for all presidents after the civil war who were democrats, for example.

Default Searches
Finally something I personally find extremely useful: adding default searches to any instance of a supertag.
For our #Authors, we might want to see all the books each author has written, and adding this manually would be tedious work.
What we can do instead is add a search node to the #Author tag that looks for books written by that author, like this:
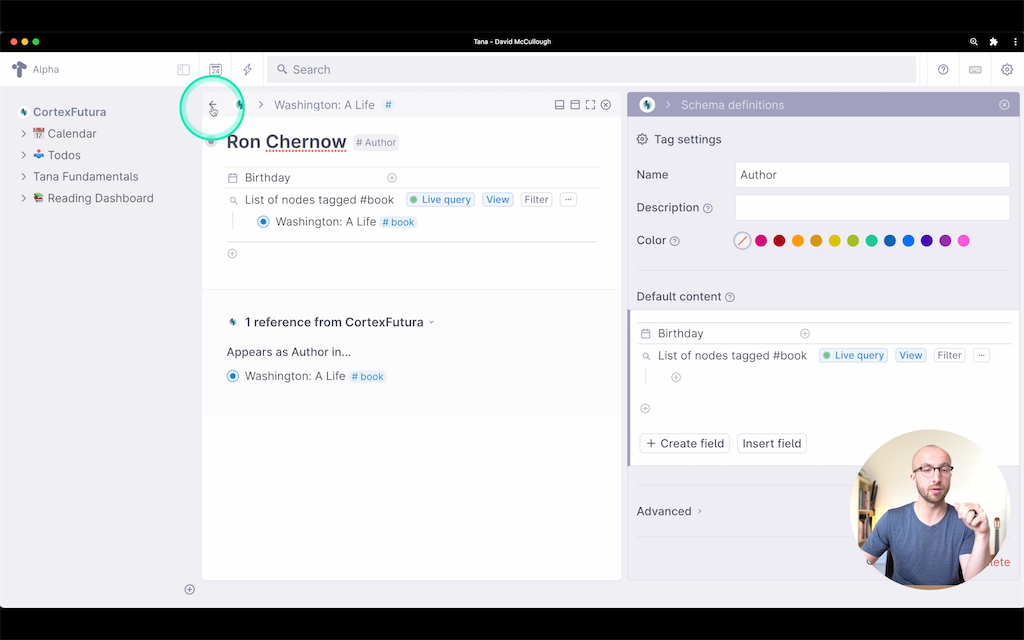
To make this work, I've added a search node to the "Default Content" section of the author tag, which searches for #book and where the "Author" field of the book is set to PARENT.
Parent? Yes – this is Tana's way to refer back to the node the search is nested under. This way we can "generalize" this search query so that it works for everyone tagged as #Author and not just any specific author.
As you can imagine, this is extremely powerful in all sorts of use-cases. A #project tag can show you all the #tasks for it, an #Organization tag all the #Employees that work there and so on.
Wrapping Up
Aaand we're through – for now! Over the last six lessons I've taken you through all the fundamental features of Tana, and we've built a nice reading dashboard along the way.
You're now ready to explore Tana on your own and hopefully have a good grasp of its power. There's much more to discover and discuss, and I hope to do so in future lessons.
If you enjoyed this lesson, consider signing up for my Tana Tips email list!
Related Topics
Join My Tana Tips Newsletter
To be the first to know about new Tana features, tutorials, and other material I publish, join the 3000+ smart folks in my Tana Tips newsletter.
