Tana
Using Tana's Live Search Feature
Learn how to use Tana's live searches.

In this lesson of Tana Fundamentals we're taking the data we've recorded about nodes in the last lesson and make it work for us.
We left the previous lesson with a node under which we had created and pasted references to nodes tagged as #book. Obviously, as your workspace grows, this becomes a lot of manual work to maintain. Tana's "live search" nodes help avoid this manual work – and will give you much more.
Search Nodes in Tana
To get a list of all the nodes tagged as #book in our workspace, we create a new node and type Cmd/Ctrl+k and search for "Find nodes". We hit Enter, which will let us narrow down our search: "Find nodes with tag #book as list", and confirm our selection.
This will result in a view like this:
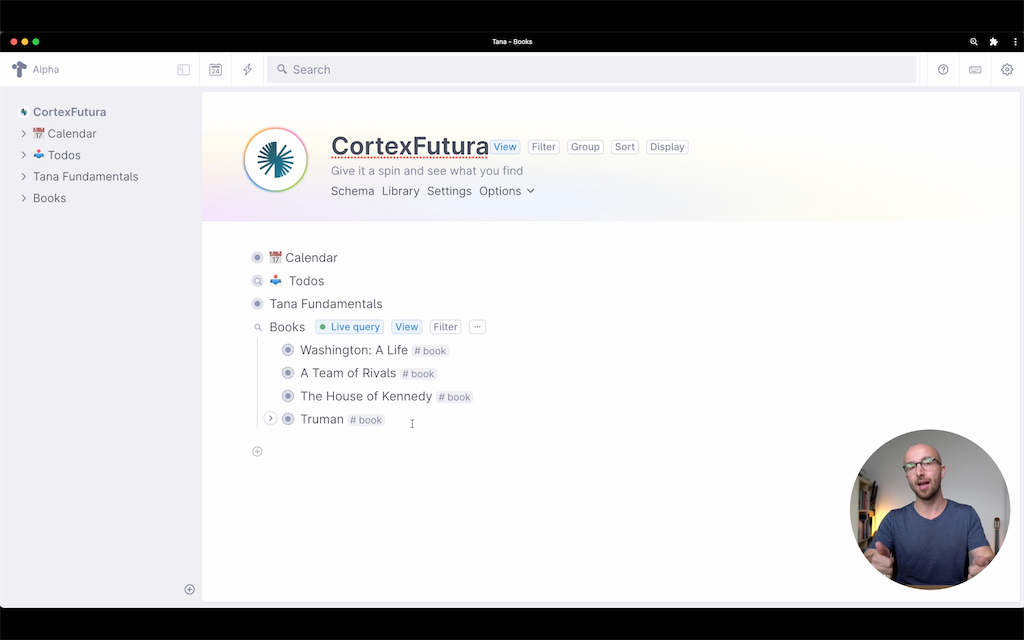
What we've just created is called a "live search" in Tana, and you can do a bunch of things with it that are super powerful.
You can, for example, add indented nodes just like with any normal node. The powerful part is that these child nodes are immediately tagged as #book and will as closely match further search and filter conditions as possible (we'll get to that later in more detail). Here is how that looks:
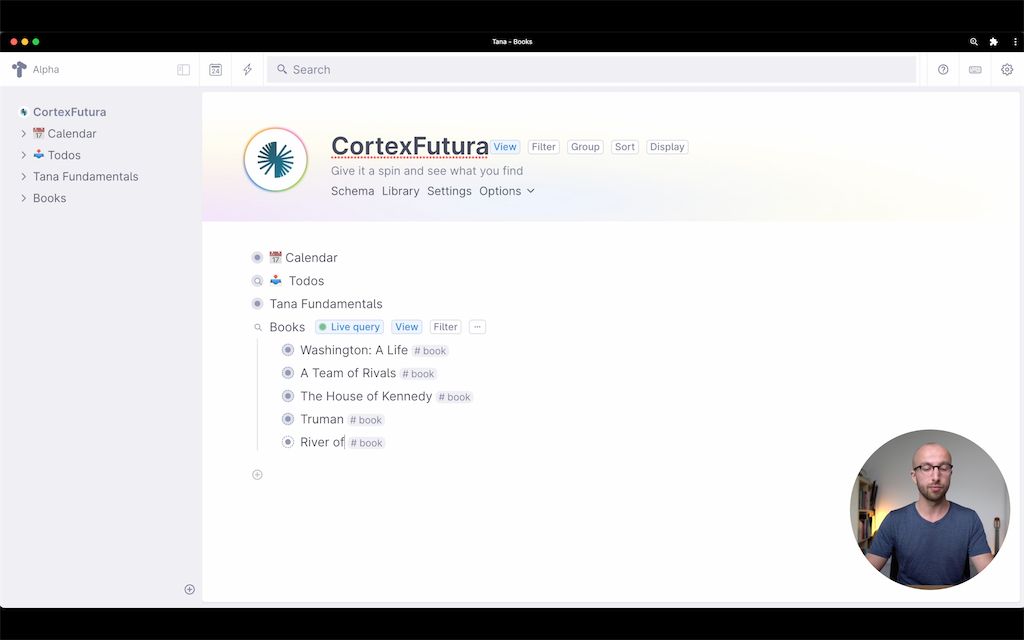
You might ask yourself where these newly created nodes "live" – where does Tana put them? Tana will put any node you create "inside" a live search on your Daily Note. I find this very convenient because it allows me to see when I've added things to my workspace no matter where I add them.
Live searches can do way more than give you a mere list of nodes with a tag.
Because live searches are also "just" nodes (remember, in Tana everything is a node!), you can apply all the different views to them.
Different Views
In the previous lesson we wanted to see a table of our books that showed the Author and Topic fields as columns.
Table View
To create a table view of a live search, you click on the "View" button next to the node title and select the view you like. Below, you'll see our book list turned into a table.
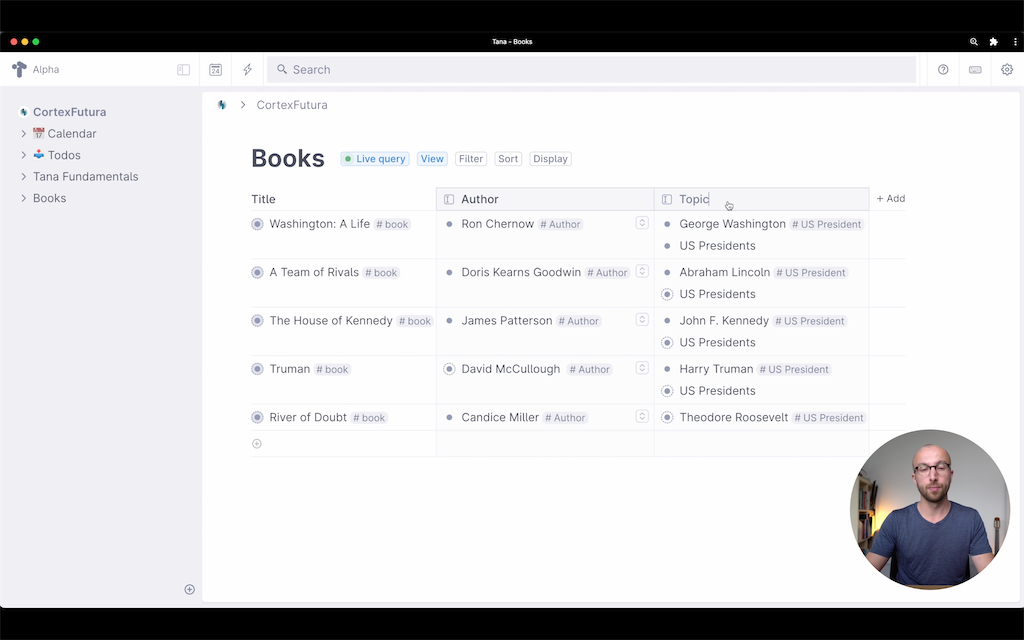
If you want to change the order of columns shown, you can right-click any column header and select "Move column left" or "Move column right".
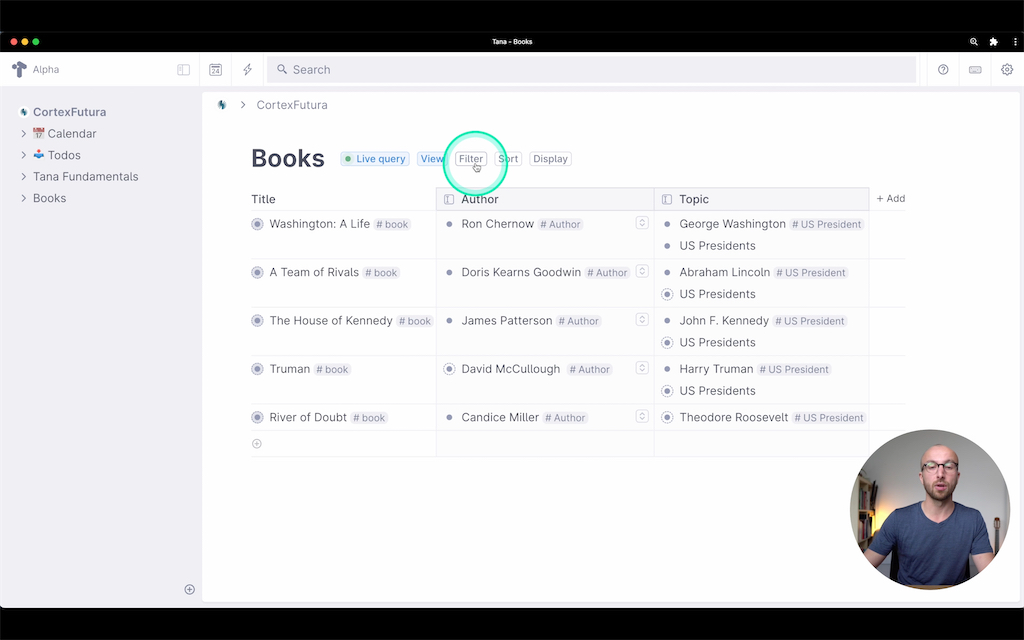
Next to the "View" button at the top, you also find a "Filter" button. With this, you can filter your search results to the values of any field.
If you want to see only books by XYZ author, you click on the "Filter" button, which will display a bar above the first search result. Select "Author" here and the author whose books you want to see. The same works for Topics, of course. If you want to select a subset of authors or topics to filter to, hold the Shift-key when selecting.
So far we have recorded three pieces of data about our nodes: that they are-a #book and that they have-a topic and author.
But one thing we might want to have is an indicator of whether we've read the book, are still reading it, or plan to read it in the future.
We can easily add this by clicking the "+ Add" button at the far right of our table.
This will let us add a new columns. In this case we'll call it "Reading status".
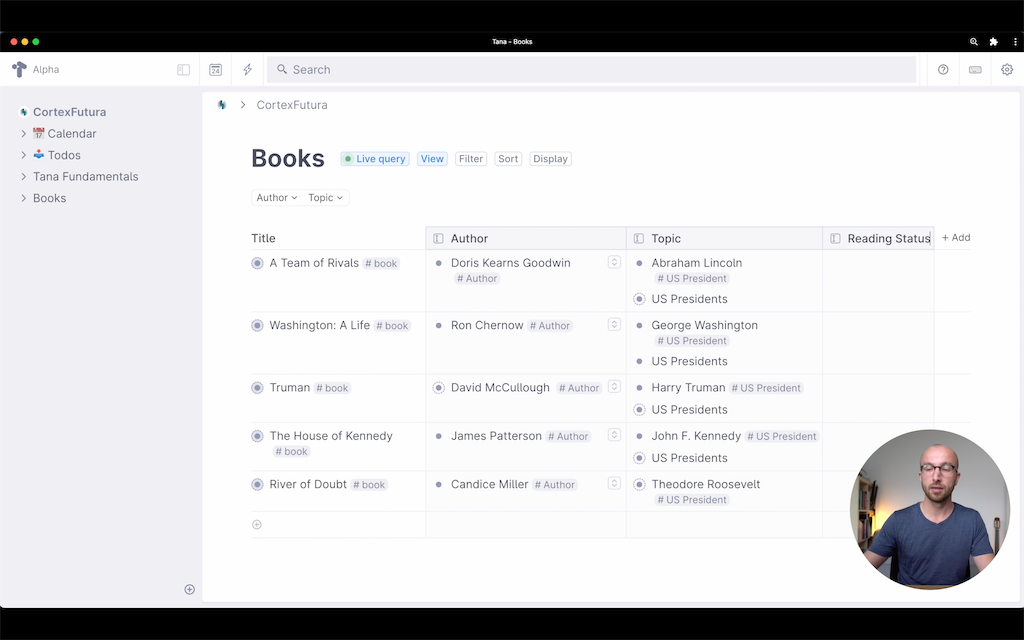
Because columns are in truth just fields for the nodes, we can configure our "Reading status" column like any other field. To prevent us from having to type (and potentially mis-type) the status over and over again, let's make it so the "Reading status" field presents us with a dropdown of three values: "to read", "reading", "read".
To do this we click into the column header of "Reading status", open the command prompt (Cmd/Ctrl+k) and type "configure field". As a Field type we select "Fixed options" and enter the three reading statuses.
Cards View
Having the reading status as a field for each book is great, but there are better ways to see how big your "to read" pile is than a long table.
If you click the "View" button again and select "Cards View", every node will turn into its own card. We can group these cards by their reading status, which will give us a nice "Kanban Board" style view.
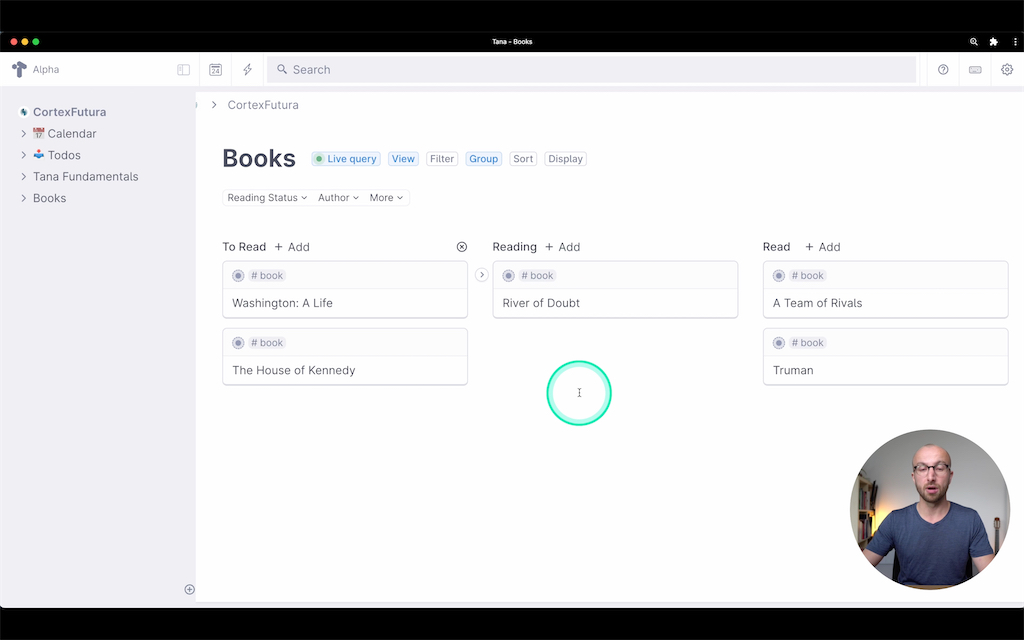
To group cards by a field, select the "..." button close to the "View" button, select "Group" and then the field you want to group your cards by.
What's neat about this view is that you can drag-and-drop cards between the groups and the associated field will update automatically to reflect this. So if you drag a card from "to read" to "reading", its field value will switch from "to read" to "reading".
As you can see, Tana's live search is quite powerful – you can search across your whole workspace to find all the books, and then turn the results into a table you can sort, filter, and add columns to. Or you show your search results as cards on a Kanban board by grouping by one of their fields.
And yet we have only scratched the very surface of what's possible with Tana's search feature. But before we get to this, we have to deal with one more thing: adding fields to nodes enables obviously useful features like the table view and kanban board, but adding them manually is a lot of busywork.
We can get around this busywork by using supertags, a feature that's incredibly powerful and will enable really great workflows in combination with the live searches we covered in this lesson.
We'll look at supertags in the next lesson of Tana Fundamentals.
Related Topics
Join My Tana Tips Newsletter
To be the first to know about new Tana features, tutorials, and other material I publish, join the 3000+ smart folks in my Tana Tips newsletter.
